How to Plan a Gallery Wall Step by Step
A seven-step sequence for planning a gallery wall: measure, set an outer boundary, edit your pieces, arrange them on the floor, compare versions, transfer with paper and hang from the center.
At a glance
- Difficulty
- Easy
- Time
- About 1 to 2 hours of planning, plus hanging
- Best for
- A wall above a sofa, console or sideboard
- Renter note
- Planning needs no holes; hanging does. Check your lease or ask before making changes.
What you need
- Tape measure
- Paper and pencil for a sketch
- Painter's tape, tested on your surfaces first
- Phone camera
- Plain paper for templates
- Level
Most gallery walls that go wrong were hung first and planned afterward. One frame goes up, the next is placed by eye, and by the fifth the group has wandered off to one side.
It is far easier to plan a gallery wall on the floor, where changing your mind costs nothing. The sequence below runs from the first measurement to the last frame. Every number in it is a starting point: the figure that works for you depends on your wall, your frames, the furniture below and your own taste.
Step 1: Measure the wall and the furniture
Write down four things before you touch a frame:
- The width and height of the free wall.
- The width of the furniture below it, and how high its top or back sits.
- Where the furniture sits on the wall, since it is often not in the middle.
- Anything that interrupts the surface: switches, vents, a thermostat, a door frame.
A rough sketch with these numbers on it is enough. You will come back to it at every later step.
Step 2: Set the outer boundary
The boundary is an invisible rectangle that the whole display stays inside. Deciding it now stops the group from sprawling later.
For width, about two-thirds to three-quarters of the furniture width is a common starting point, not a rule. Center the rectangle on the furniture, not on the wall, when the two do not match. For the bottom edge, roughly 6 to 10 in (15 to 25 cm) above a sofa back or console top is a common starting point, depending on how tall the furniture is and whether people lean back against the wall. At the top, leave a clear band of wall below the ceiling so the group does not look jammed in.
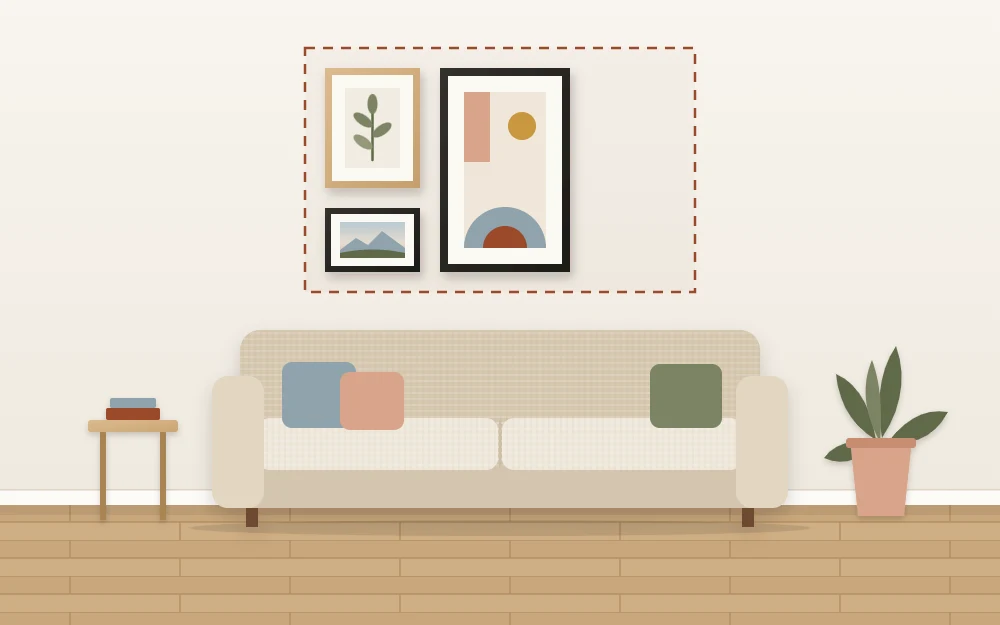
Anything hung above the sofa or other seating needs to be securely fixed, so keep that in mind when you decide how low the bottom edge goes.
Step 3: Collect and edit the pieces
Gather more pieces than you expect to use, then edit. Choose the one piece the group will be built around; the guide to choosing an anchor piece explains what makes a good one. Next, set aside anything that shares nothing with the rest: no common finish, color or subject.
Check the remaining pieces against the boundary. If their combined area looks tiny inside the rectangle, you need a larger piece or a smaller boundary. If they would only fit edge to edge, remove one or two.
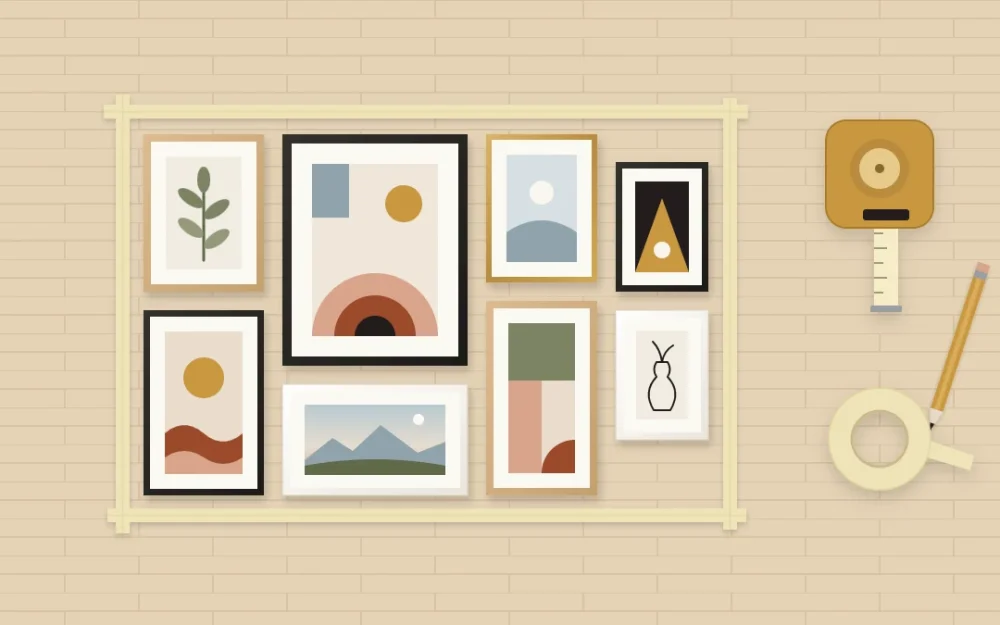
Step 4: Arrange on the floor inside a taped rectangle
Mark a rectangle on the floor with painter’s tape, the same size as the boundary. Decide the general shape you are aiming for; the comparison of gallery wall layouts will help if you are torn between a tidy grid and a loose cluster. Then build the arrangement in this order:
- Place the anchor piece at or near the center.
- Put the next largest pieces on opposite sides of it.
- Fill the spaces between with medium and small pieces.
- Even out the gaps. The gallery wall spacing guide covers how to choose a gap and keep it consistent.
- Check that the outer frames reach the tape on all four sides without crossing it.
Good to know
Tape can react differently to floors and walls, because finishes and surfaces vary. Test a short piece in a hidden spot first, and follow the tape manufacturer instructions for use and removal.
Step 5: Take a snapshot of a few versions and choose
Stand over the arrangement and take a phone snapshot from directly above. Then change something real, such as moving the anchor off-center or swapping the two sides, and take another. Three versions is plenty.
Look at the snapshots small on the screen. At that size you stop seeing individual pictures and start seeing the shape, the gaps and where the dark or heavy pieces sit. Pick the version that looks even, then leave it overnight if you can. A choice that still looks good the next morning is the one to hang.
Step 6: Transfer the layout with paper templates
A floor arrangement tells you how the pieces relate to each other. It cannot tell you how the group sits on the wall. To see that, make a paper cutout of each frame and tape the papers up in the same arrangement, using the taped rectangle as your reference. The method for making and using paper templates includes how to mark each frame’s hanging point on its paper, which removes most of the measuring.
Step back to the far side of the room and sit where you normally sit. Shift the whole group up, down or sideways until it feels settled with the furniture.
Step 7: Mark and hang the central piece first
Begin with the anchor. Mark its hanging point, fix it, and check it with a level. Then hang its neighbors and work outward to the edges, checking the gap each time against the one you chose.
Choose mounting hardware for your wall type and the weight of each frame, and follow the hardware manufacturer instructions. For a mirror or a large glazed frame, get help if you are unsure.
Tip
Keep the floor snapshot open on your phone while you hang. It is the quickest way to confirm which piece goes where when the papers start coming down.
When the numbers do not fit your wall
The fractions and ranges above are examples, and plenty of walls call for something else:
- Narrow furniture on a wide wall. Let the boundary run wider than the furniture and treat the piece below as one element of a larger composition.
- A very tall wall. Keep the group related to the furniture instead of stretching it upward to fill the height.
- Thick or oversized frames. Give them a little more room, both between frames and above the furniture.
- A wall with no furniture. Set the boundary around a comfortable viewing height for the people who use the room.
Trust what you see from across the room over any figure. If the paper version looks settled, it is settled.
Frequently asked questions
How wide should a gallery wall be compared with the sofa?
About two-thirds to three-quarters of the sofa width is a common starting point, centered on the sofa. The width that suits you depends on the wall, the size of your frames and how full you like the display to look, so tape the outline on the floor or wall and judge it by eye before committing.
Should I plan a gallery wall on the floor or on the wall?
Use both, in that order. The floor is the quick place to try arrangements and settle how the pieces relate to each other. Paper cutouts on the wall then show how the group sits with the furniture, the ceiling and the switches, which a floor arrangement cannot show.
Which frame do I hang first?
Hang the central or anchor piece first, then its neighbors, then work toward the edges. Starting in the middle keeps the group centered where you planned it, and any small drift in the gaps ends up at the outer edge, where it is much harder to notice.


