Gallery Wall Templates: Test Your Layout With Paper First
Trace your frames on paper, mark each hanging point and tape the cutouts to the wall. This step-by-step method lets you see and adjust the whole arrangement before making any holes.
At a glance
- Difficulty
- Easy
- Time
- About 1 hour to make and tape the templates, plus a day to live with them
- Best for
- Any group of four or more frames, especially above furniture
- Renter note
- Templates need no holes, but tape can still mark some surfaces. Test it first, and check your lease or ask before making changes.
What you need
- Plain paper or kraft paper
- Pencil
- Scissors
- Tape measure
- Low-tack painter's tape
- Level
An arrangement that looked right on the floor can look quite different once it is upright, above furniture and under a ceiling. Finding that out with frames means extra holes. Finding it out with paper means moving a bit of tape.
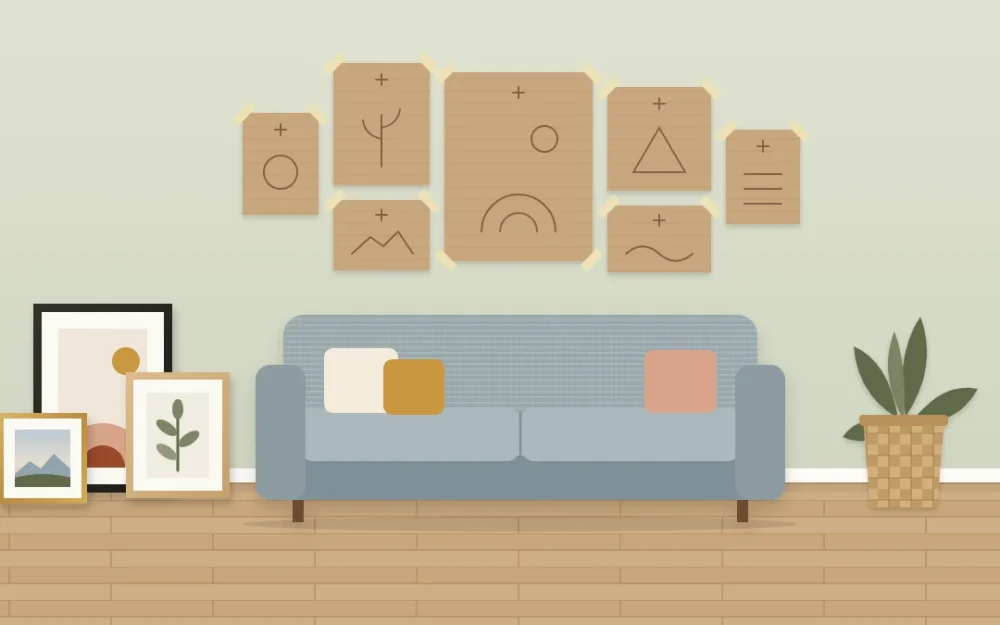
Gallery wall templates are paper cutouts the same size as your frames, taped up where the frames will go. You see the whole arrangement at full scale, shift it as often as you like, and mark the wall only when you are sure.
What paper shows you that the floor cannot
A floor layout settles how the pieces relate to each other. Paper on the wall answers the remaining questions: how high the group sits, whether it is centered on the furniture, how close it comes to a switch or a door frame, and whether the overall size suits the wall. It also carries the exact position of each hanging point, so you do less measuring on the wall itself.
What you need
- Plain paper: kraft paper, wrapping paper used on the plain side, or newspaper
- A pencil and scissors
- A tape measure
- Low-tack painter’s tape
- A level
Paper in a tone that contrasts with the wall is easiest to judge from a distance.
The paper-template method in seven steps
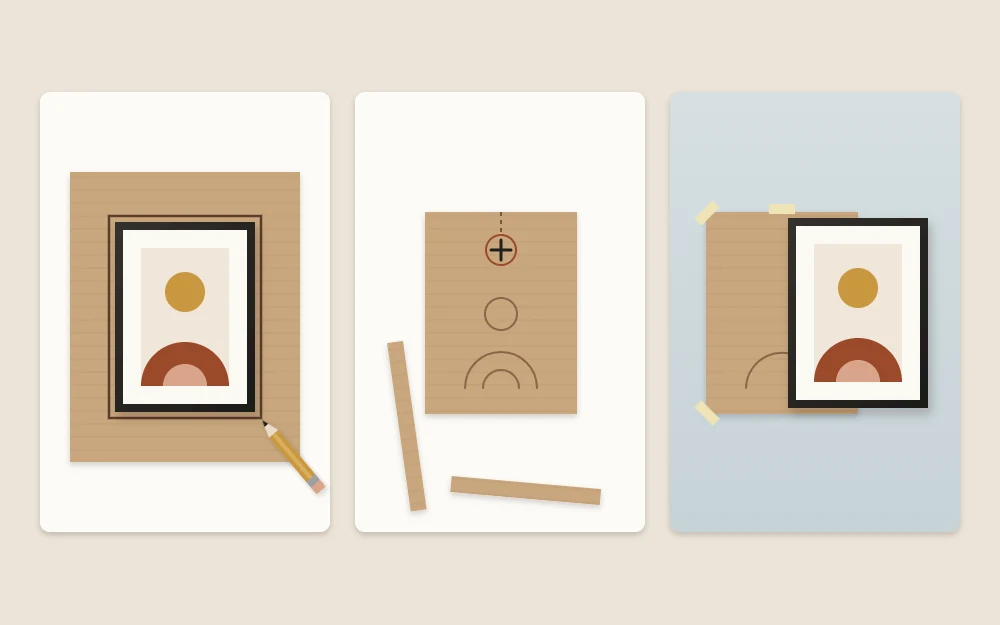
- Trace each frame. Lay the frame face down on the paper and draw around its outer edge.
- Cut out and identify. Cut along the line, then draw a quick sketch of the picture on the paper, a tree or a face or a few stripes, so you know which piece it stands for and which way up it goes.
- Find the hanging point. Turn the frame over. Measure from the top edge down to the point where the hardware will rest once the frame hangs. With a wire, pull it taut toward the top first, as it would sit under load. Measure in from one side as well.
- Copy that point onto the paper. Mark the same spot on the cutout with a small cross. A frame with two hangers gets two crosses.
- Tape the papers to the wall. Start with the central piece and work outward, using small pieces of tape at the corners. Check the central one with a level.
- Live with it. Leave the papers up for a day. Look from the doorway, from your usual seat, in daylight and in the evening. Move anything that bothers you.
- Fix through the cross. Put each fixing straight through its marked point, tear the paper away and hang the frame.
Before you hang anything
Even low-tack tape can react with a wall, because paint finishes and surfaces vary. Test a small piece in a hidden spot first, use as little as will hold the paper, and follow the tape manufacturer instructions for use and removal. Fresh paint needs extra caution.
What to check while the paper is up
Use the day of waiting to look for specific things:
- The outline. Squint. The papers should form one clear shape, not a scatter.
- The link to the furniture. The group should look attached to the piece below it, not floating far above.
- The gaps. Uneven gaps are obvious in plain paper. The guide to spacing between frames covers how to choose a gap and hold it.
- Obstacles. Check that no cutout covers a switch or sits in the path of a door.
- The seated view. A group that looks fine standing can feel high from a chair.
If the arrangement itself feels wrong, not just its position, take the papers down and go back a stage. The step-by-step guide on how to plan a gallery wall covers setting the outer boundary and editing the pieces.
Fixing through the paper
The cross tells you where the fixing goes; it does not tell you which fixing to use. Choose mounting hardware for your wall type and the weight of each frame, and follow the hardware manufacturer instructions. For a mirror or a large glazed frame, get help if you are unsure.
Work from the center outward, and hang each frame as soon as its fixing is in. Seeing real frames go up beside the remaining papers lets you catch a problem while there is still paper to move. For frames with two hanging points, hold a level across the two crosses before you commit.
Two alternatives to plain paper
A floor layout and a snapshot
Arrange the frames on the floor, take a phone snapshot from directly above and hang from the picture, measuring as you go. It is quicker to set up and suits a simple row of three. For anything larger you lose the full-scale preview and have to measure every hanging point on the wall.
Stiff card cutouts
Cutouts made from stiff card packaging do not curl or tear, and you can reuse them when you rearrange. They are heavier than paper, so they need more tape, which makes the surface test more important. Lift each card away before you place the fixing, marking the cross position on the wall in pencil first.
Small problems and quick fixes
- The paper keeps curling. Roll it the opposite way before cutting, or add tape at the middle of each side.
- You cannot tell the cutouts apart. Add a note of the frame finish next to the sketch.
- The hung frame sits lower than its paper. The wire was slack when you measured. Remeasure with it pulled taut and correct the remaining templates.
- You are short of frames for the space. Cut a blank template for the missing piece and leave it up as a reminder of the size to look for.
If this is your first attempt at a group of pictures, the beginner’s guide to gallery walls explains the decisions that come before the paper stage.
Frequently asked questions
What paper is best for gallery wall templates?
Any plain paper large enough for your biggest frame works: kraft paper, the plain side of wrapping paper or newspaper. A tone that contrasts with the wall is easiest to read from across the room. For frames you expect to rearrange often, stiff card cutouts last longer, though they need more tape to stay up.
How long should I leave the templates on the wall?
About a day is a useful minimum, because it lets you see the arrangement in daylight and lamplight and from the places you normally sit and stand. Follow the tape manufacturer instructions on how long it can stay up, since some tapes are intended for short use only.
How do I mark the hanging point on a frame with picture wire?
Pull the wire up toward the top of the frame at its middle, as it would sit when hanging, and measure from that point to the top edge. Mark the same distance down from the top of the paper cutout, centered side to side. Measuring with a slack wire places the frame lower than planned.