Organic Gallery Wall Layout: A Loose Cluster That Still Looks Planned
Build a relaxed, salon-style cluster from frames of different sizes in three passes, with the steady gap, soft outline and repeated details that keep it from looking messy.
At a glance
- Difficulty
- Intermediate
- Time
- About 1 to 2 hours on the floor, plus templating and hanging
- Best for
- A wall above a sideboard, sofa or console, and a set of frames in mixed sizes
- Renter note
- The floor layout needs no holes; hanging does. Check your lease or ask before making changes.
What you need
- Frames in mixed sizes
- Tape measure
- Clear floor space
- Phone camera
- Plain paper for templates
- Pencil
- Level
You have frames in five different sizes, some upright and some wide, and no two that line up. That is not a problem to solve. It is the raw material for an organic gallery wall, the loose, salon-style cluster that looks as if it was gathered over years.
The fear is that loose turns into messy. It does when pieces go up one at a time wherever there is room. It does not when you build in a set order, largest pieces first, and hold on to a few quiet constants that the eye reads as intention.
What keeps a loose cluster from looking random
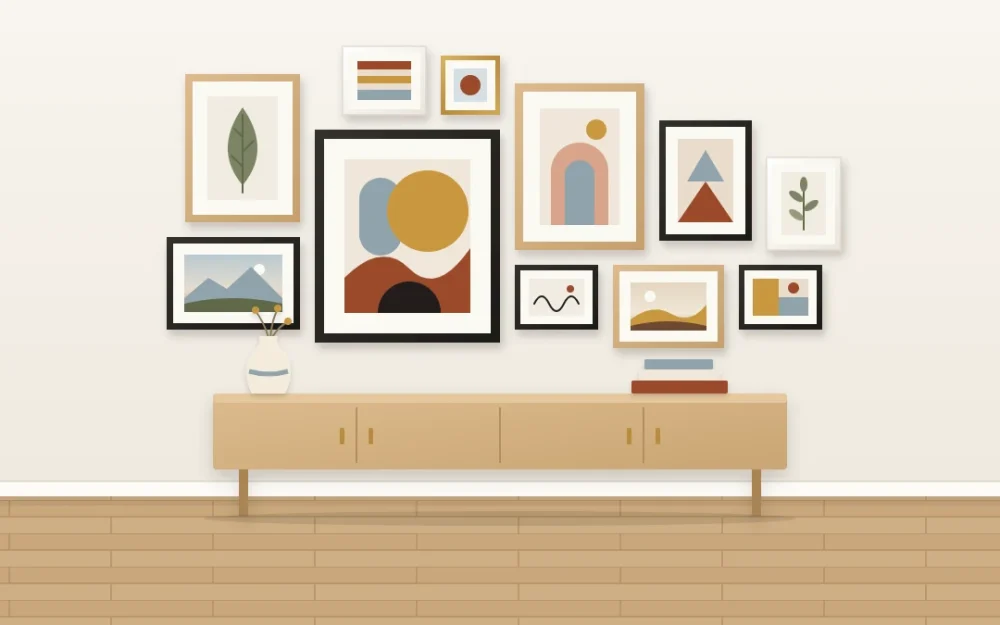
In an organic layout the frame edges do not align, so something else has to carry the order. Three things do it:
- A steady gap. The space between neighbors stays close to the same all the way through, even though the frames differ.
- A readable outline. Seen from across the room, the whole group forms a rough oval or a soft-cornered rectangle, not a shape with arms.
- Repetition. A color or a frame finish turns up again and again, tying distant pieces together.
Hold those three and almost everything else can vary.
Build it in three passes
Work on the floor first, inside a rectangle the size of the space you want to fill. Moving a frame on the floor takes a second; moving one on the wall leaves a hole.
Pass one: the largest piece, slightly off-center
Set your biggest or boldest piece a little to the left or right of the middle, and a little above or below it. Dead center tends to pull the arrangement toward symmetry, which is a different layout. If you are unsure which piece deserves this spot, the guide to choosing and placing an anchor piece will help you decide.
Pass two: the next largest, diagonally opposite
Take the second and third largest pieces and place them across the group from the first: if the anchor sits upper left, the next goes lower right. This spreads the heavy pieces so the cluster does not tip to one side. Add the remaining medium pieces around the anchor, turning some upright and some wide.
Pass three: small pieces in the spaces between
Now use the small frames to fill the pockets left over. Slide them until each sits about the same distance from its neighbors. Small pieces work well in pairs, stacked or side by side, where a single one would leave an awkward hollow.

Keep the gaps close to consistent
This is the single habit that separates a collected look from a scattered one. Pick a gap and use it between every pair of neighbors. Roughly 2 to 3 in (5 to 8 cm) is a common starting point, but the number that suits you depends on the frame sizes, the wall dimensions and how airy you want the group to feel.
Because edges do not line up, you will not hit the gap exactly everywhere. Aim for close. A gap that is suddenly twice as wide as the others reads as a missing picture, so close those first.
Tip
Take a phone picture of each floor version from directly above. Wide gaps and a lumpy outline are much easier to spot on a small screen than when you are standing over the frames.
Shape the outline and mix the orientations
Look only at the outer edge of the group. You want a soft oval or a loose rectangle, wider than it is tall above furniture, taller than it is wide on a narrow wall. A single frame that sticks out like a peninsula is the usual culprit; tuck it in or give it a companion.
Inside the outline, alternate upright and wide pieces so no row or column forms by accident. Two frames of the same size side by side begin to look like the start of a grid, and the eye then expects the rest to follow.
Repeat something at least three times
Choose one thread and make sure it appears in at least three places, spread across the cluster and not bunched together: three black frames, three pieces with the same rust tone, three natural wood finishes. Three points form a triangle, and the eye travels around it instead of stopping at one spot.
If your frames are in many finishes, the article on combining different frames explains how to limit and distribute them. Once the pieces are in place, check the whole for lopsidedness using the methods in the guide to distributing visual weight.
Stop short of the wall edges
An organic cluster needs bare wall around it to read as one object. Leave a clear margin on every side, wider than the gaps inside the group, and keep the cluster narrower than the furniture beneath it. Filling the wall from corner to corner turns a composition into wallpaper.
When the floor version looks right, transfer it with paper templates before any hole is made, then hang the anchor first and work outward.
Before you hang anything
Choose mounting hardware for your wall type and the weight of each piece, and follow the hardware manufacturer instructions. A cluster hung above the sofa needs every piece securely fixed. For a large or heavy frame, ask someone to help if you are unsure.
Leave room for the cluster to grow
A loose layout is the easiest kind to add to, as long as you plan for it.
- Decide which direction it will grow, usually sideways above furniture or upward on a narrow wall, and leave the extra margin on that side.
- Finish the center completely. New pieces join at the edges, where they do not disturb what is already there.
- Add in pairs when you can, one on each side, so the outline keeps its shape.
- Match the existing gap when a new piece goes up, and check that your repeated color or finish still reaches the new edge.
A cluster of seven that is well spaced looks finished today and still has somewhere to go.
Frequently asked questions
How many pieces does an organic gallery wall need?
Five to seven is enough to read as a cluster, and nine to twelve gives a fuller, collected look. What matters more than the count is variety in size: you need at least one clearly larger piece, a few medium ones and several small ones to fill the spaces between them.
Should the frames in an organic layout line up anywhere?
They do not need to. One or two shared edges inside the group can add a little calm, but if too many align the arrangement starts to look like a grid that went wrong. Rely on a steady gap and a tidy outer shape for order instead of matching edges.
Can I start an organic gallery wall with only a few frames?
Yes. Begin with a compact group of five built around your largest piece, finish the center fully and leave extra bare wall on the side where you plan to grow. Add later pieces at the edges, keeping the same gap, so the outline expands without disturbing what is already hung.