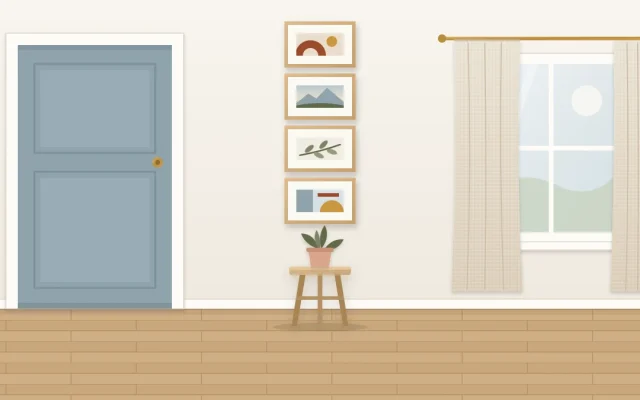
Entryway Gallery Wall: A Welcoming Display by the Door
A practical sequence for an entryway gallery wall: map the door swing and coat zone, anchor the group with a mirror, then add sturdy frames and a small ledge.

The wall just inside the front door works harder than any other in the house. It is the first thing a visitor sees and the last thing you see on the way out, and it is also where keys land, coats pile up and bags get dropped. An entryway gallery wall has to share the space with all of that.
That is why the order of decisions matters here more than in other rooms. Settle the practical zones first, then fit the display into what is left, and the pictures will look intentional instead of squeezed between hooks. The sequence below runs from the open door to the last frame.
Begin with the view from the open door
Step outside, open the door the way a guest would and notice which stretch of wall you see first. That is the wall to work with, even if a larger one sits around the corner. In some homes it faces the door; in others it runs alongside it and is seen at an angle.
Scale the display to that visible stretch, not to the whole room. If the door opens against the wall and hides half of it, plan for the half that stays in view. Many entry walls turn out to be only a narrow strip, and that is fine: a group of three to five pieces is still a gallery wall. These arrangements for narrow and awkward walls show how to make a small group feel complete.
Mark the working zones before the frames
An entry has moving parts. Find them all before you decide where a single picture goes.
- Open the door fully and note how far it swings and where the handle would meet the wall.
- Hang the coats and bags you really use, at their bulkiest, and see how much wall they cover and how far they stick out.
- Note the light switch, doorbell unit, thermostat or intercom, and the space a hand needs to reach each one.
- Look at the console or bench: how wide it is, and how tall the lamp, bowl or plant on it stands.
- Sketch what remains. That shape is your display area.
The remaining area is often smaller and more oddly shaped than expected. Working within it is what keeps frames from being knocked every morning.
Tip
Do this check in the season when the entry is fullest. A wall that looks roomy in summer can disappear behind winter coats and scarves.
Anchor the group with a mirror
A mirror earns its place by the door twice. It gives you a last look before leaving, and it gives the arrangement an obvious center. Because it reflects light from the open door, it also makes a tight entry feel a little less closed in.
Place the mirror where the people in the household can use it, then treat it as the largest shape in the composition and arrange frames around it. An arched or round mirror is especially useful, since its curve breaks up a group that would otherwise be all rectangles. For more on blending frames with other objects, see this guide to adding mirrors, objects and textiles to a display.
Before you hang anything
Choose mounting hardware for your wall type and for the weight of each piece, and follow the hardware manufacturer instructions. Mirrors and large glazed frames are heavy and awkward, so ask someone to help if you are unsure.
Build a compact cluster above the console or bench
With the mirror placed, add frames outward from it and keep the group tight. A compact cluster reads as one object on the wall, which suits a small space better than frames spread thinly from corner to corner.
- Keep the overall width a little narrower than the furniture below so the two look connected.
- Let the lowest frames clear the lamp shade, the bowl and anything else that lives on the console.
- Above a bench, leave room for a person to sit back and lean without touching a frame, and make sure every piece there is securely fixed.
- Keep the gaps between pieces consistent, so the mirror and frames belong to the same group.
If the furniture sits off-center on the wall, center the display on the furniture, not on the wall. The pair will look settled together.
Choose pieces that cope with daily traffic
This is not the wall for your most fragile piece. Bags swing, umbrellas drip and sleeves catch on corners, so the frames nearest the door and the coat zone should be sturdy, flat and slim. Keep deep or delicate items for the higher, quieter part of the arrangement.
Doors matter as well. A door that closes hard sends a small shake through the wall, and frames hanging from a single point gradually drift crooked. Where you can, secure each frame at two points so it sits firmly, and add small soft bumpers behind the lower corners to help it stay put. Glance along the group now and then and straighten anything that has moved.
Add a small ledge for pieces that rotate
A short picture ledge gives the entry a place for things that change: a new drawing from school, a postcard from a trip, a seasonal print. Frames lean on it instead of hanging, so swapping one takes seconds and needs no new fixing.
Set the ledge above the console or in a spot well out of the walking line, and overlap two or three frames of different heights so it looks arranged. A ledge is also one of several ways to keep the number of wall fixings low, which is covered in these ideas for renters who want fewer holes.
Pick a first-impression theme
The entry sets the tone for the rest of the home, and a single thread makes even a few pieces feel curated. Choose one idea and let everything on the wall relate to it:
- Places: your own photos of streets, coastlines or hills that matter to you, or a hand-drawn map of the neighborhood.
- One favorite color: pieces that each carry a touch of the same blue, green or ochre, tied to the rug or the bench cushion.
- Welcome home: family pictures and children’s drawings, the faces you most want to see when you walk in.
Whichever you choose, repeat one frame finish across the group and let the mirror frame echo it. In a space seen for only a few seconds at a time, that repetition is what makes the wall register as one welcoming picture.
Frequently asked questions
Can I mix a mirror with framed pictures in an entryway?
Yes, and it is one of the most useful combinations by a door. Treat the mirror as the largest shape, place it where people can actually use it, and arrange the frames around it with consistent gaps. Repeating the mirror's frame finish in one or two picture frames helps the group look related.
How many frames does a small entryway need?
Fewer than most people expect. Three to five pieces grouped closely, or a mirror with two or three frames beside it, is often enough for the stretch of wall visible from the door. A tight small group looks more deliberate than many frames spread across a wall crowded with coats and switches.
Why do the frames near my front door keep going crooked?
A door that shuts firmly shakes the wall slightly, and frames hanging from one point shift a little each time. Passing bags and coats add to it. Securing frames at two points where possible, and adding soft bumpers behind the lower corners, helps them stay level between occasional checks.